
Having seen some pictures of furniture that had been made in the ‘Arts & Crafts Style’, I decided to give it a go myself. I like the exposed joinery – the visible tenons, the wedges – and the other details that give such character to furniture made in that style, but I also thought that it would be a good fun to make and part of me liked the idea of the slightly masochistic approach to making joints by hand.
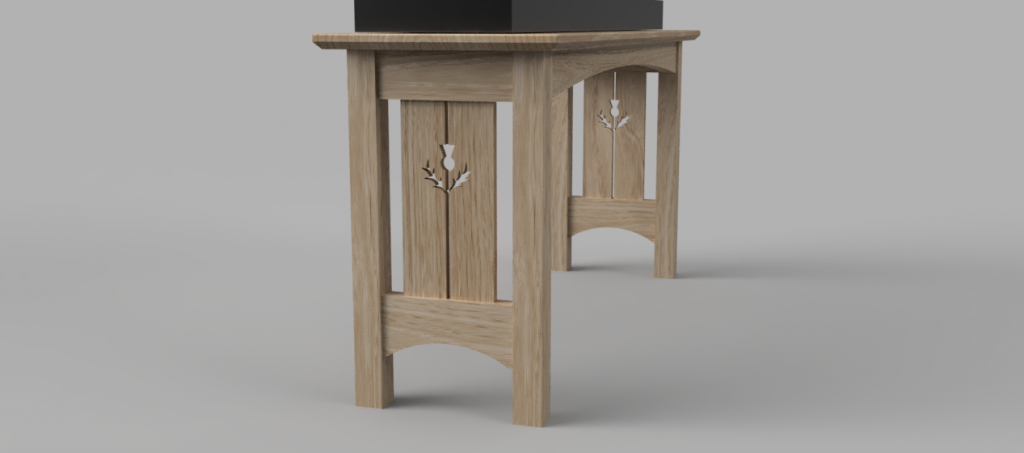
The piece was to act as a table for a TV – so it needed to be relatively shallow (~350 mm deep), relatively low to the ground (~500 mm high) and around 1000 mm long. It also needed to have a large span so that existing furniture – coffee table or footstool could be slid underneath.
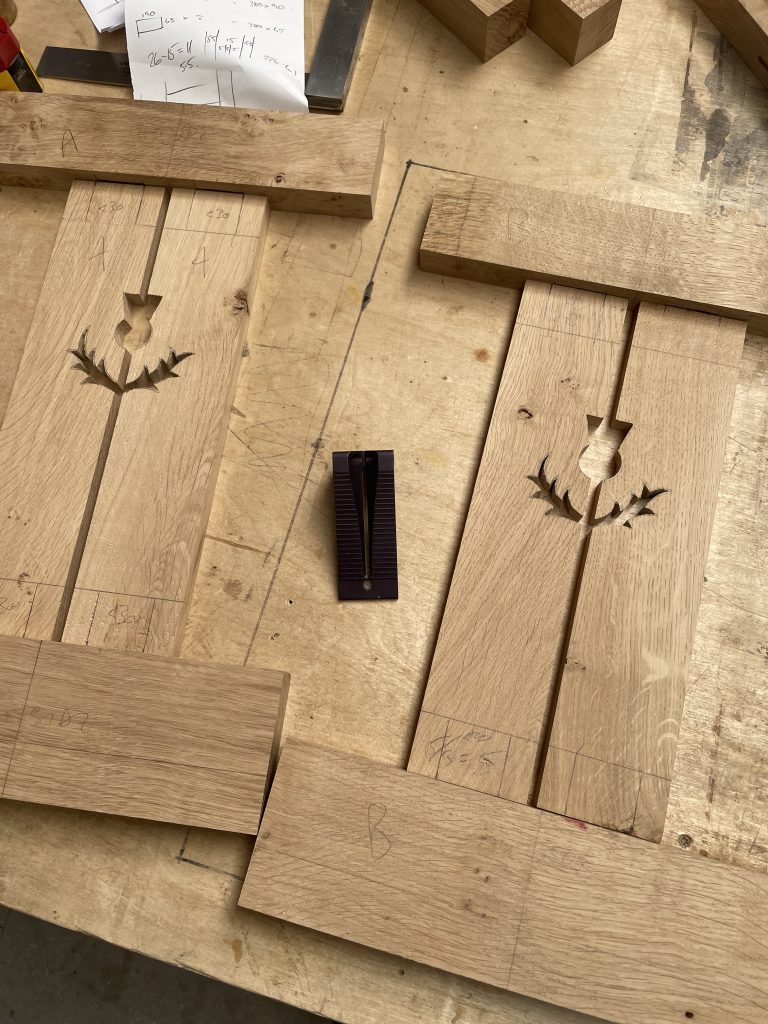
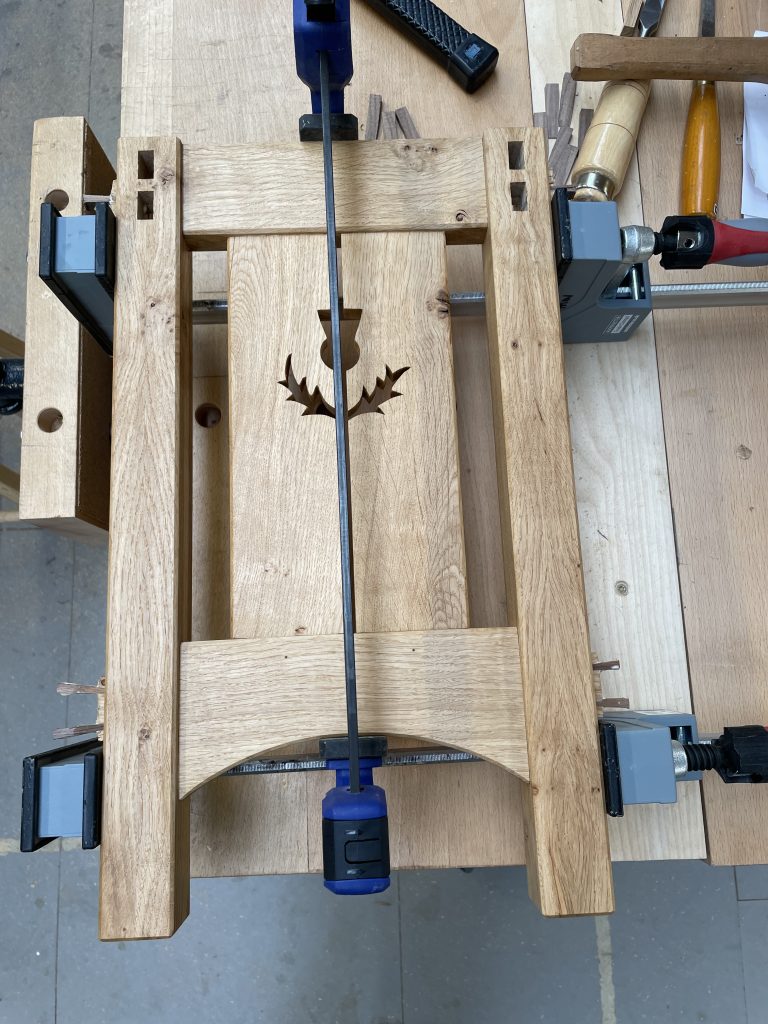
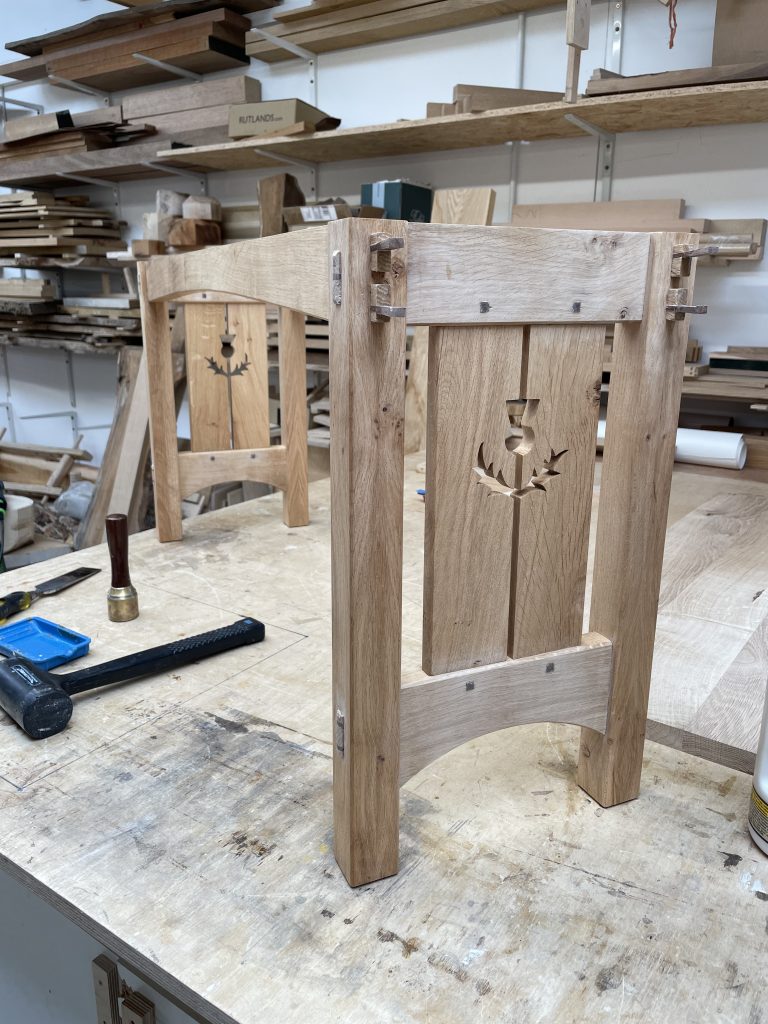
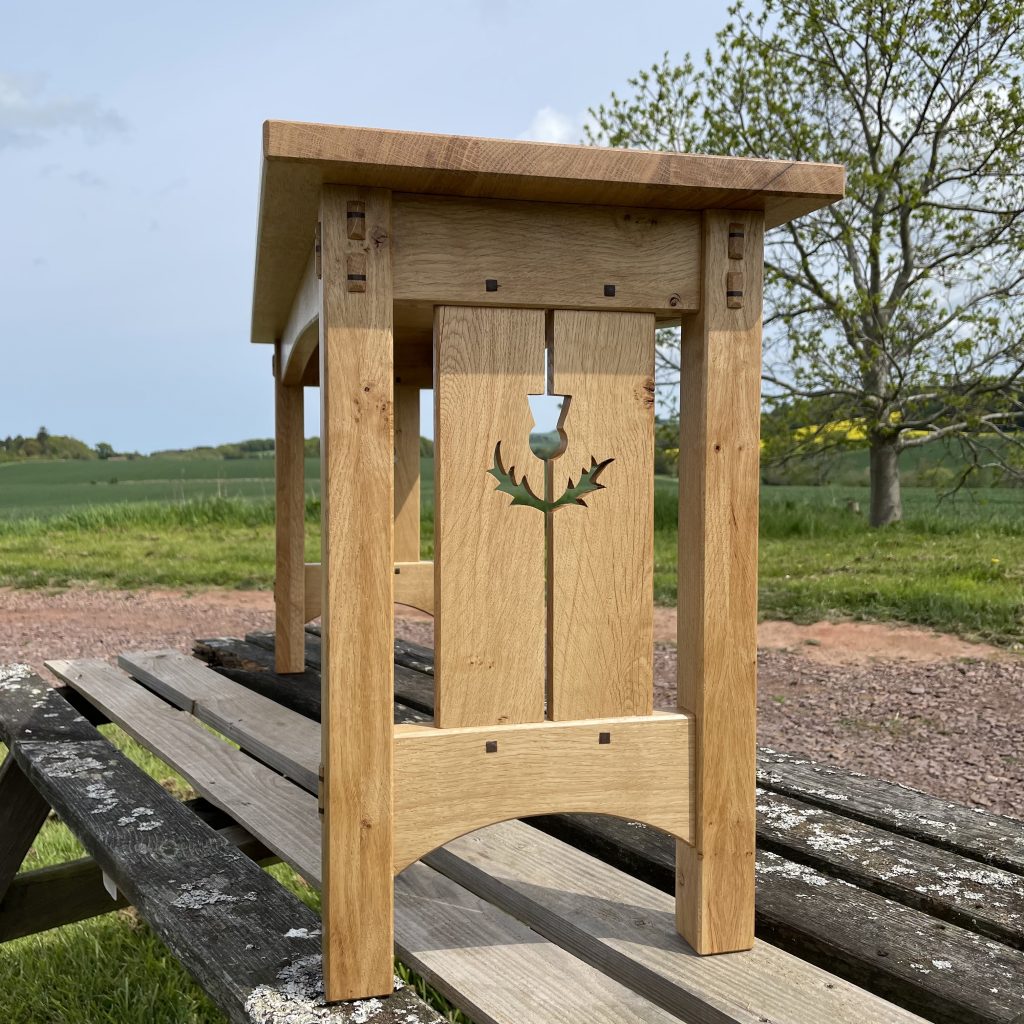
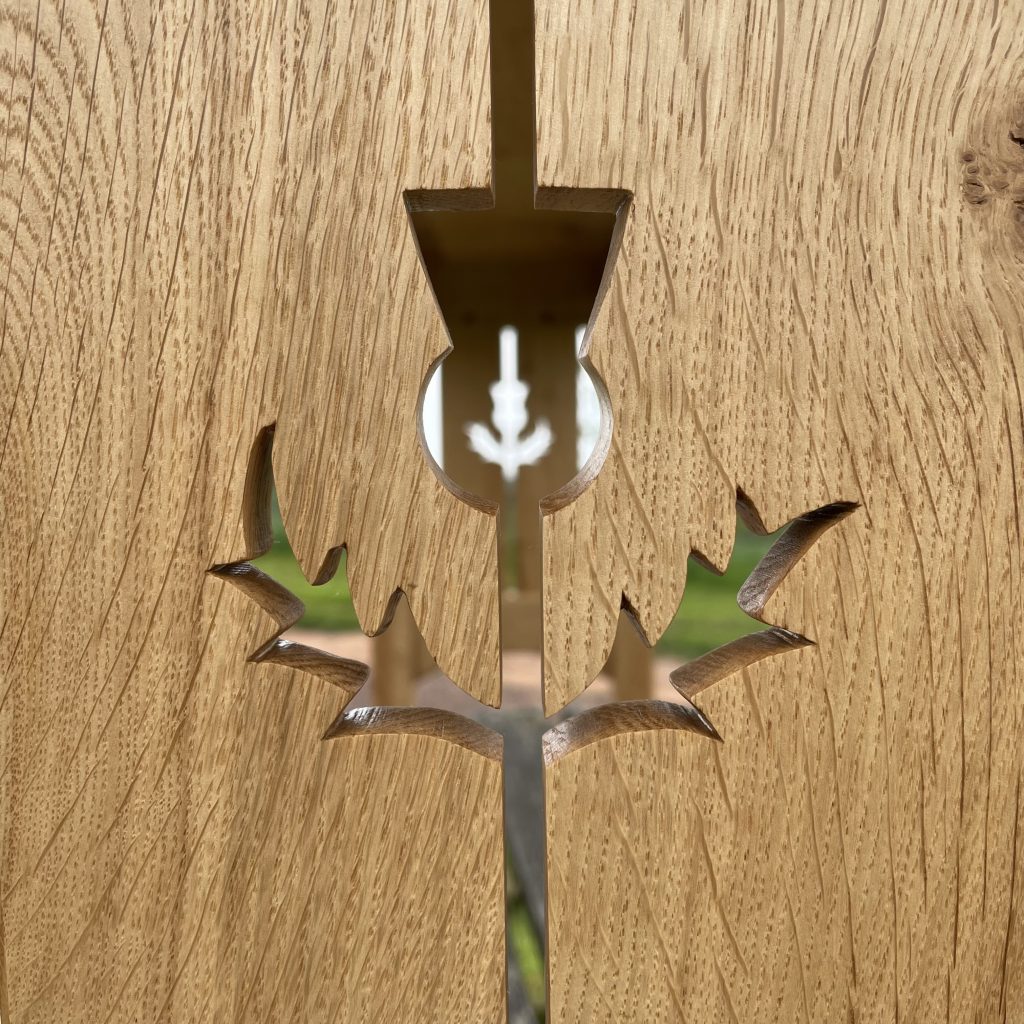
And so, I decided upon a simple structure with square legs, rectangular top and exposed joinery. The sides would be decorated with thistles and walnut pegs, and a curve would bridge the large span.
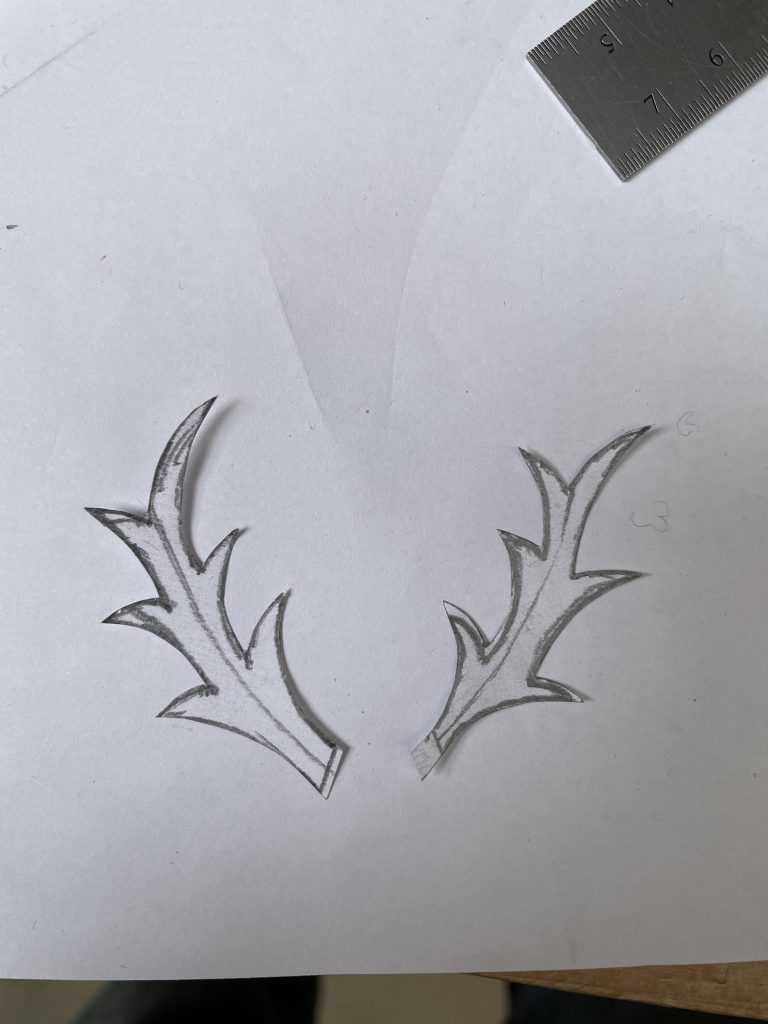
My first task was to sketch out the thistle. I had initially drawn the thistle on the computer but this meant I had no sense of scale and once I transferred it onto actual wood it was much smaller than I had envisaged it in my mind – it was only around 10 cm x 10 cm!
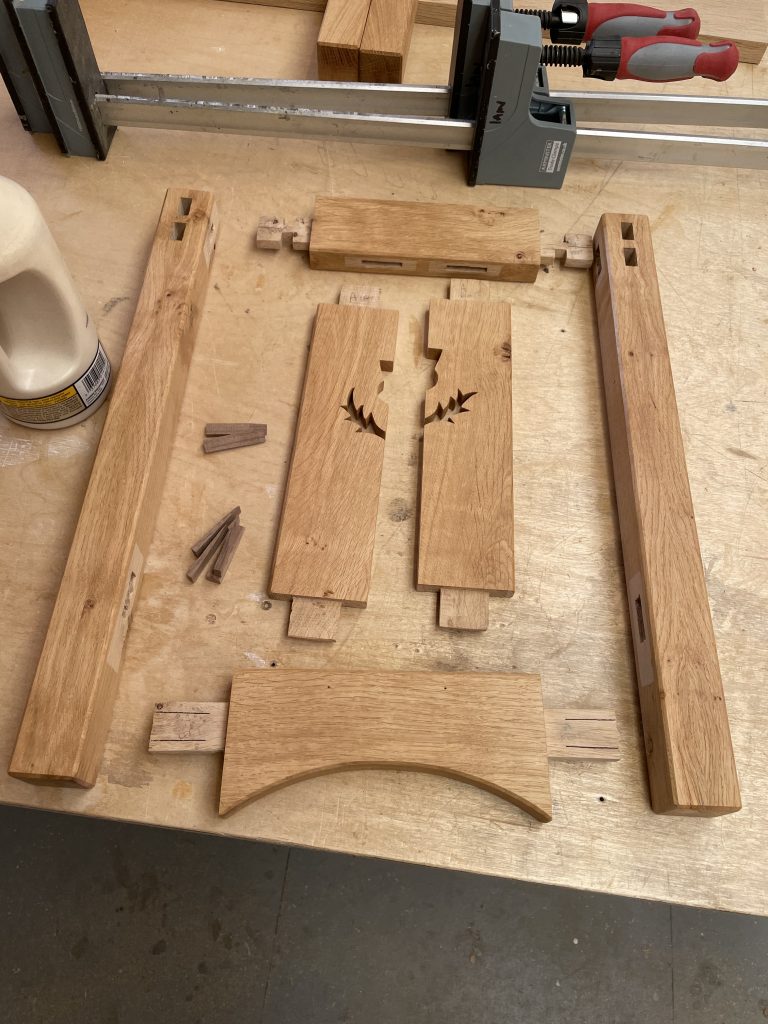
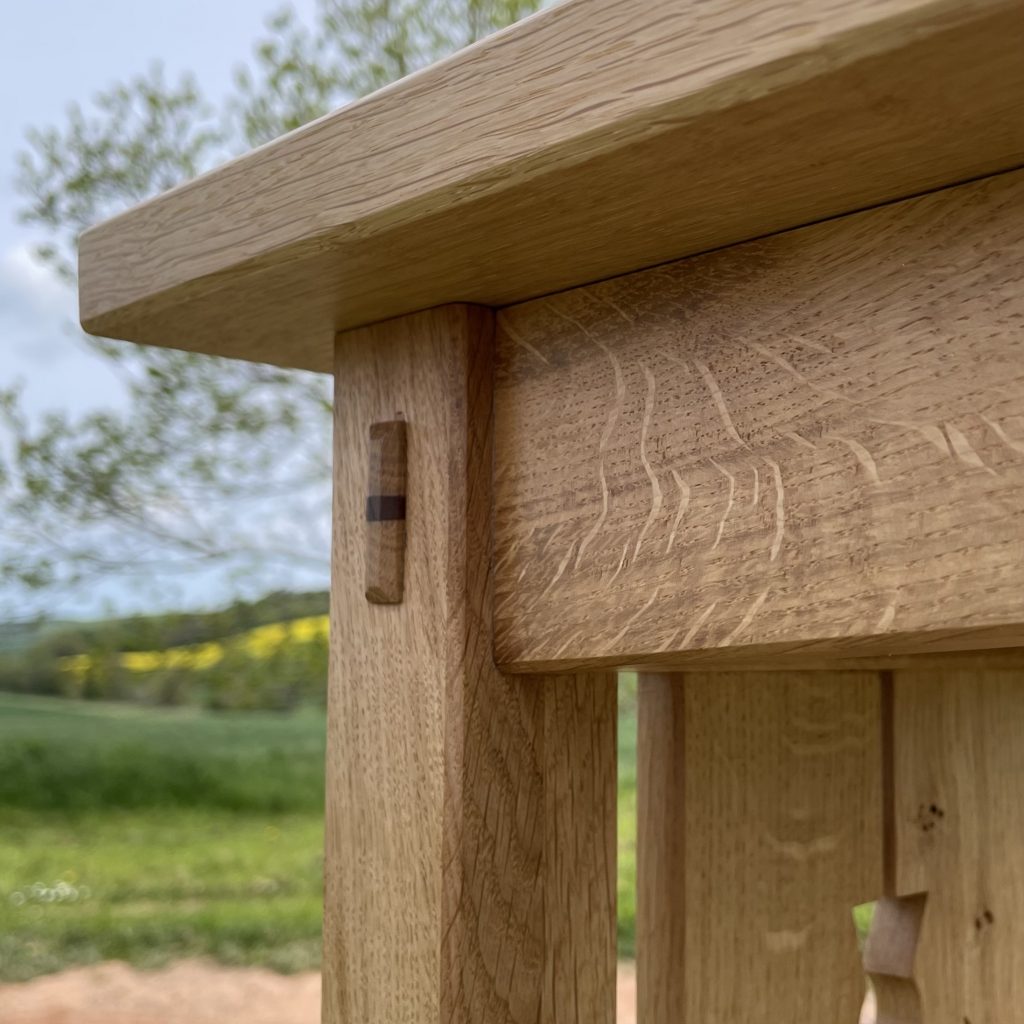
I needed to keep the table low, and the skirt narrow and so I opted for interlocking tenons at the corners – double tenons on the long skirt and the single tenons on the sides. Both would be wedged to make them stronger and also to give me a chance to get some contrasting wood into play – and they would be left protruding for visual interest. Here is my scheme for the top joints and also the pieces ready to assemble the table ends.

Glue-ups are always slightly fraught affairs. As soon as the glue is applied to the wood it starts to swell – so your joint which fit nicely when dry suddenly becomes harder to fit. You can’t take too long during assembly either – as the glue starts to cure and grabs the wood making the joints harder to press home fully. With eight joints in each end and six wedges it was necessary to work swiftly to get everything in place and clamped fully.
Completing the last tenons to make the main structure was more of the same and thankfully everything progressed well and I even remembered to check that the legs were square to the top.
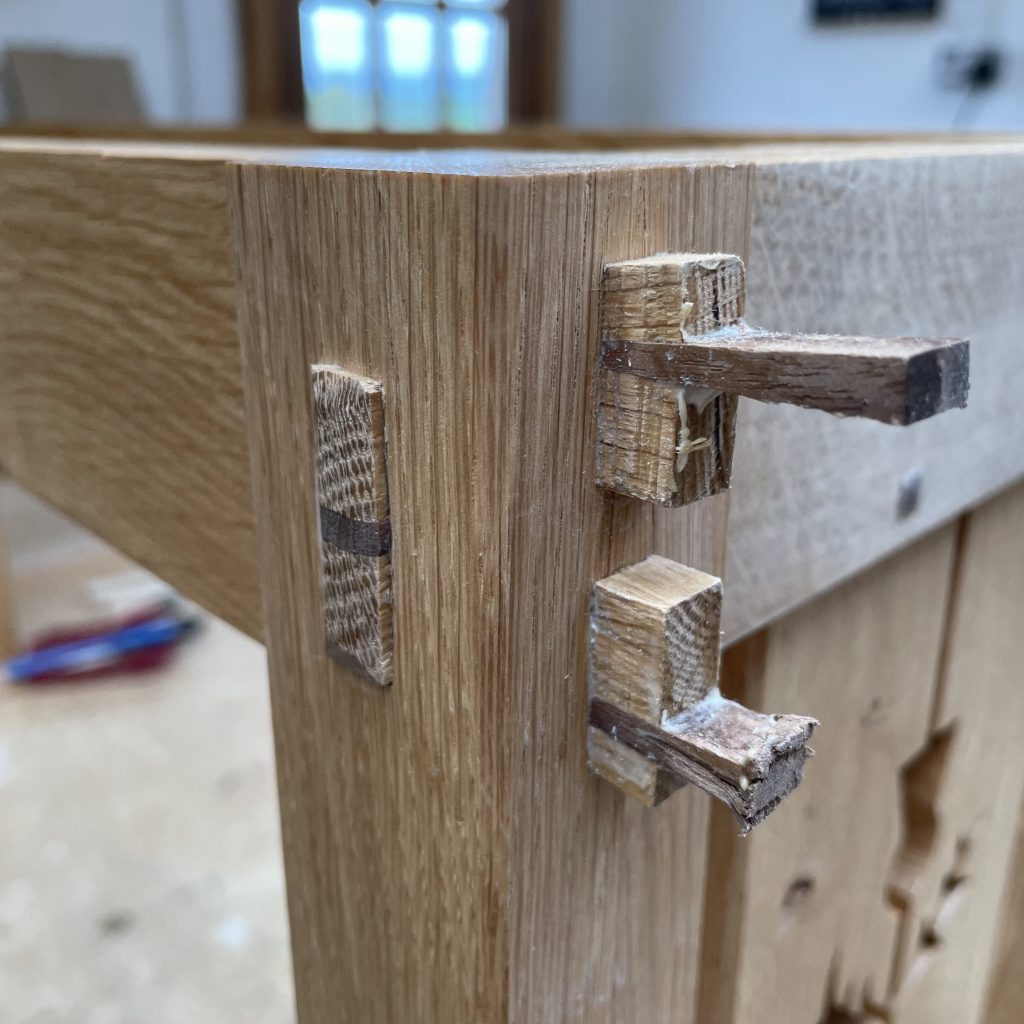
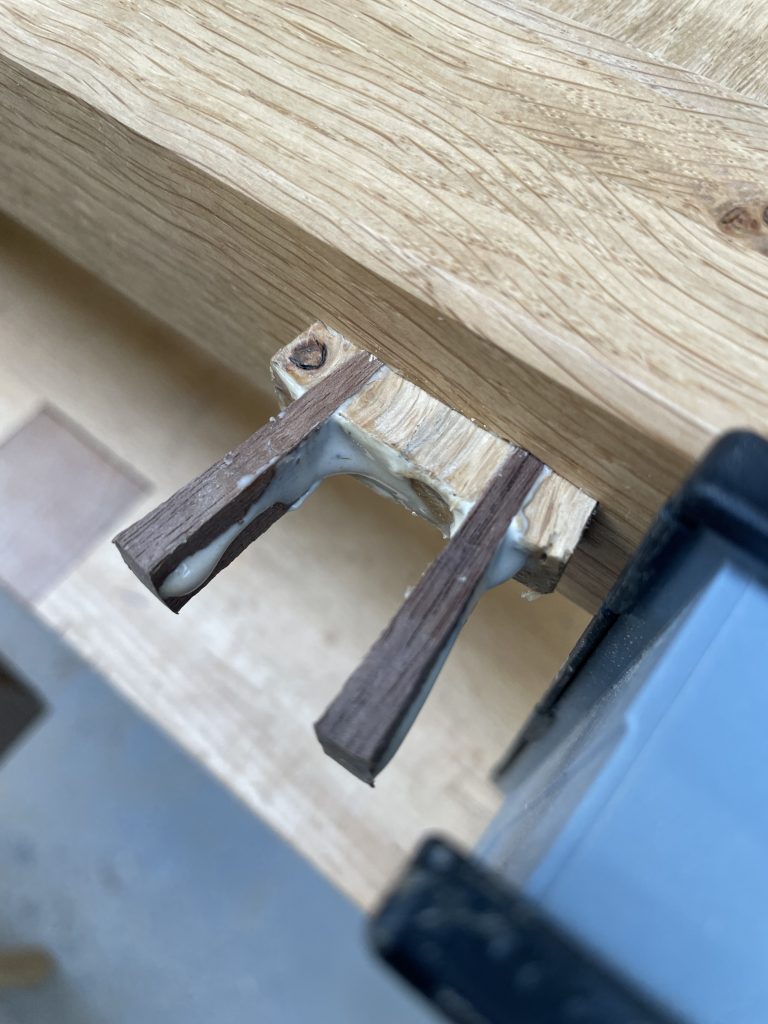
My last steps were to chamfer the edges of the joints by hand and attach the top with some wooden blocks.
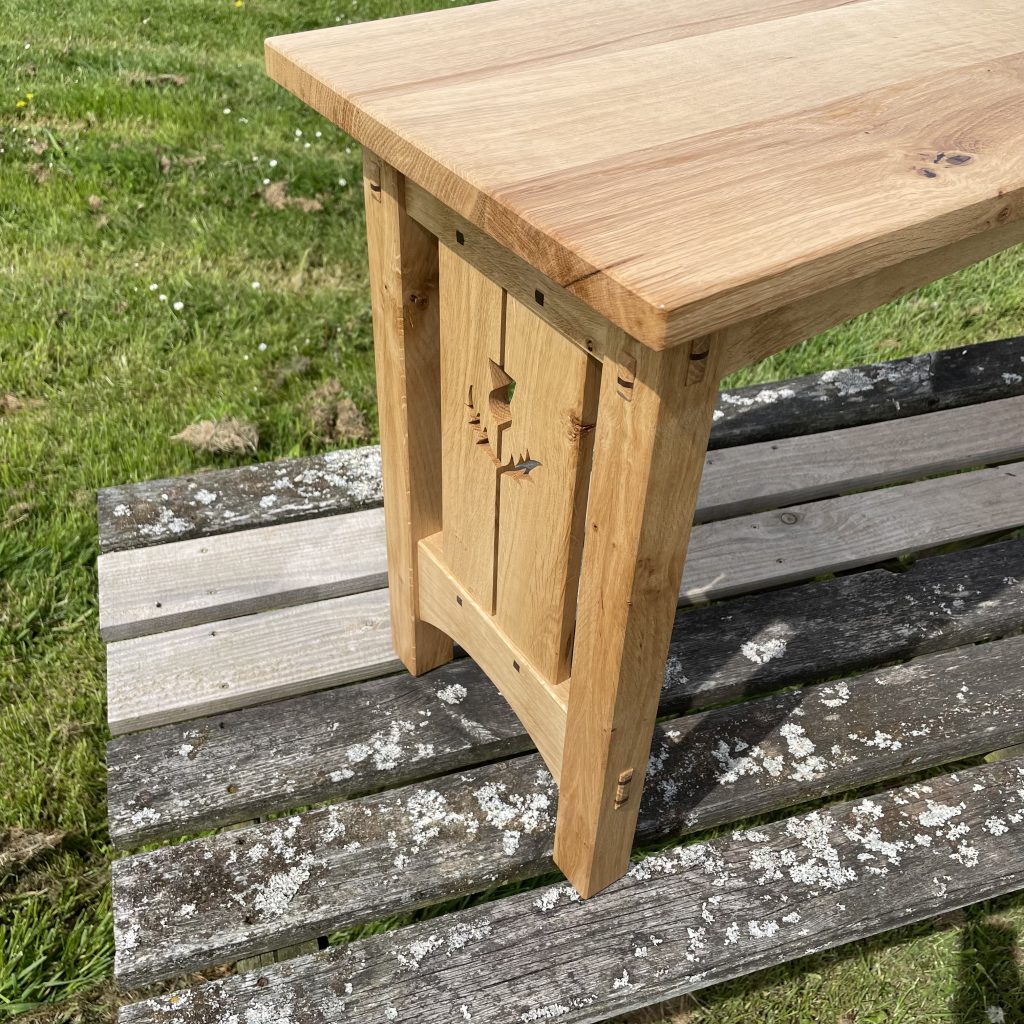
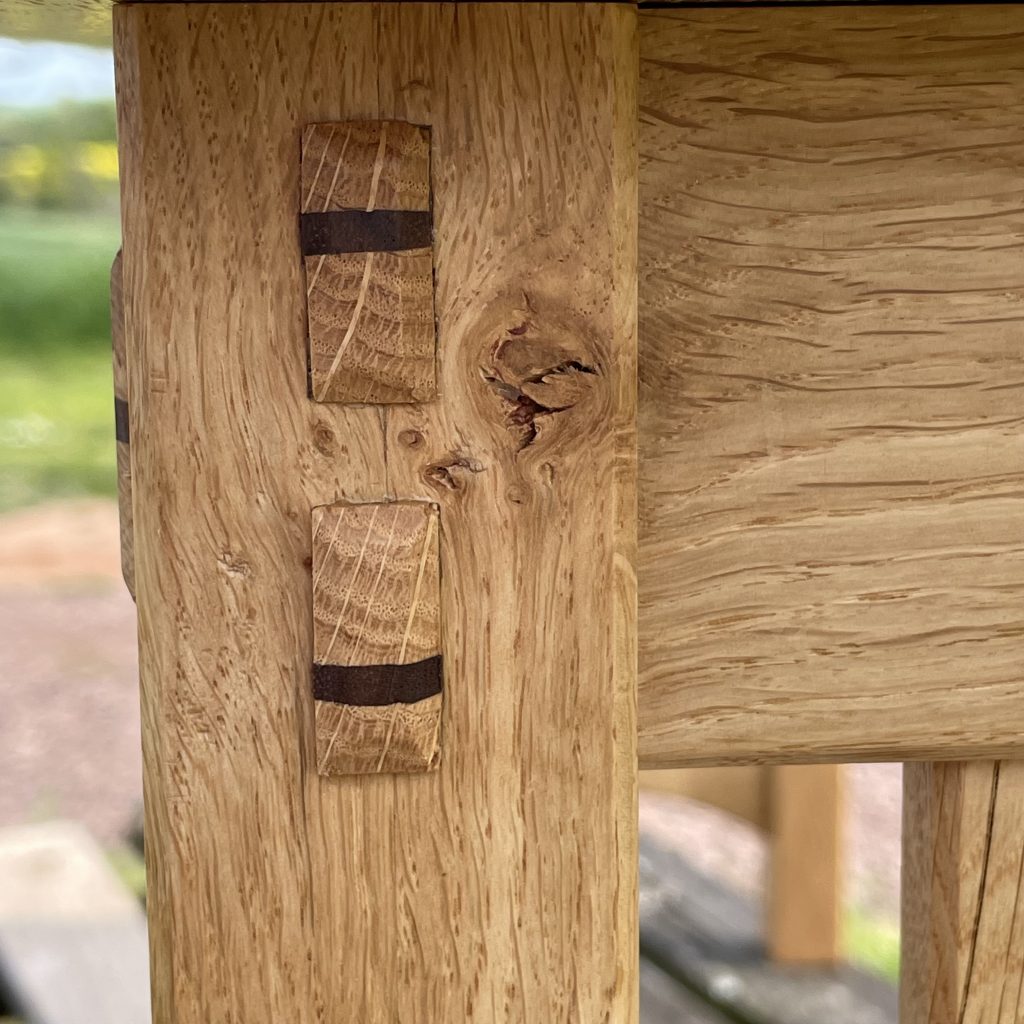

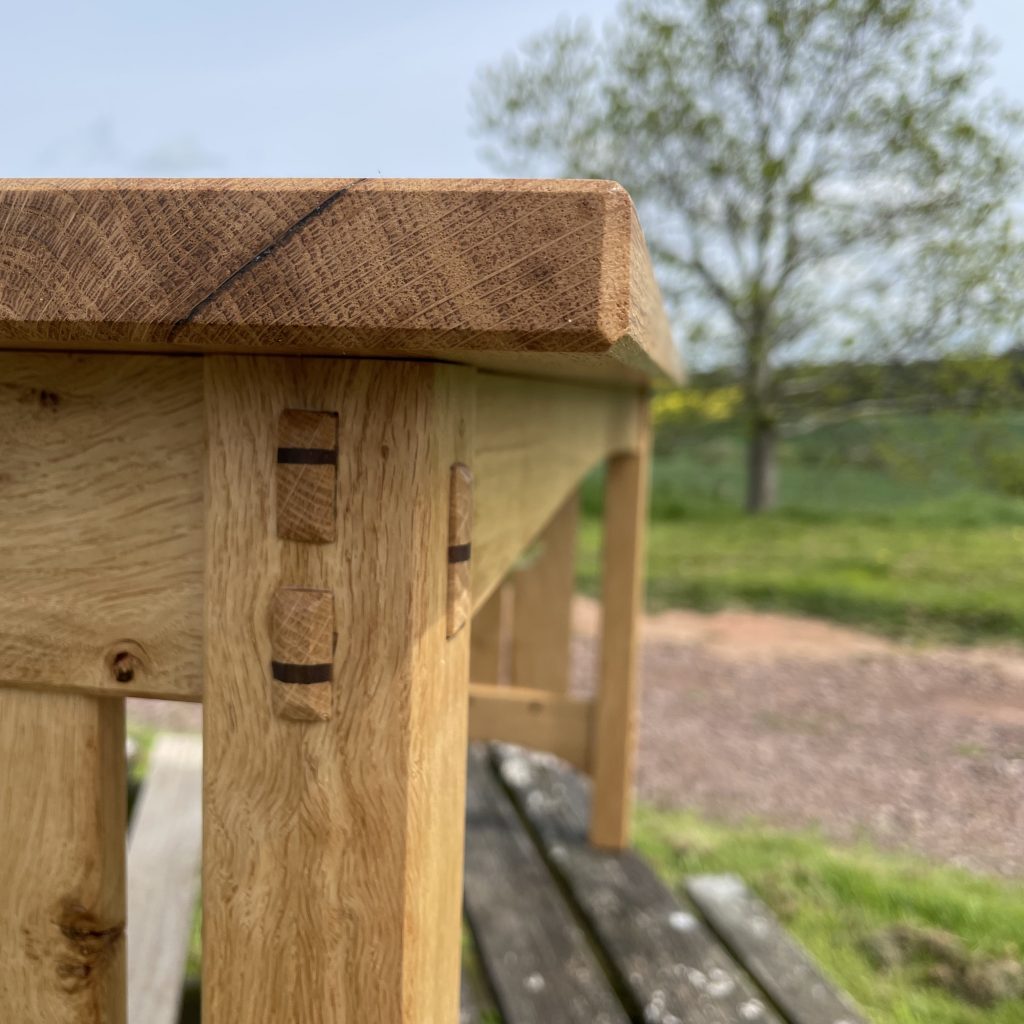

A less obvious detail is that each leg is laminated from two pieces of oak – and the two pieces are cut from the same original pieces of oak and joined in such a way as to give the ‘bookmatched’ effect in the grain pattern. The square walnut peg details that fasten the tenon joints are not necessary – I could have achieved the same visual effect by sticking a small square of walnut onto the surface.
I could have ‘faked’ the other exposed joinery too. I could have done more of the handiwork using power tools which would have been quicker and more accurate. But I was making this for myself. I wanted it to be a labour of love. I like that it isn’t coldly precise. Hopefully customers are willing to pay to have an item made with love by a craftsman.
I’m not normally prone to bouts of romanticism – but after making this I actually said to myself that this piece of furniture has soul.

