A friend saw my Buzzard console table and asked “How did you come up with the idea?”. My answer was simply, and not very helpfully, “Just sketching shapes”.
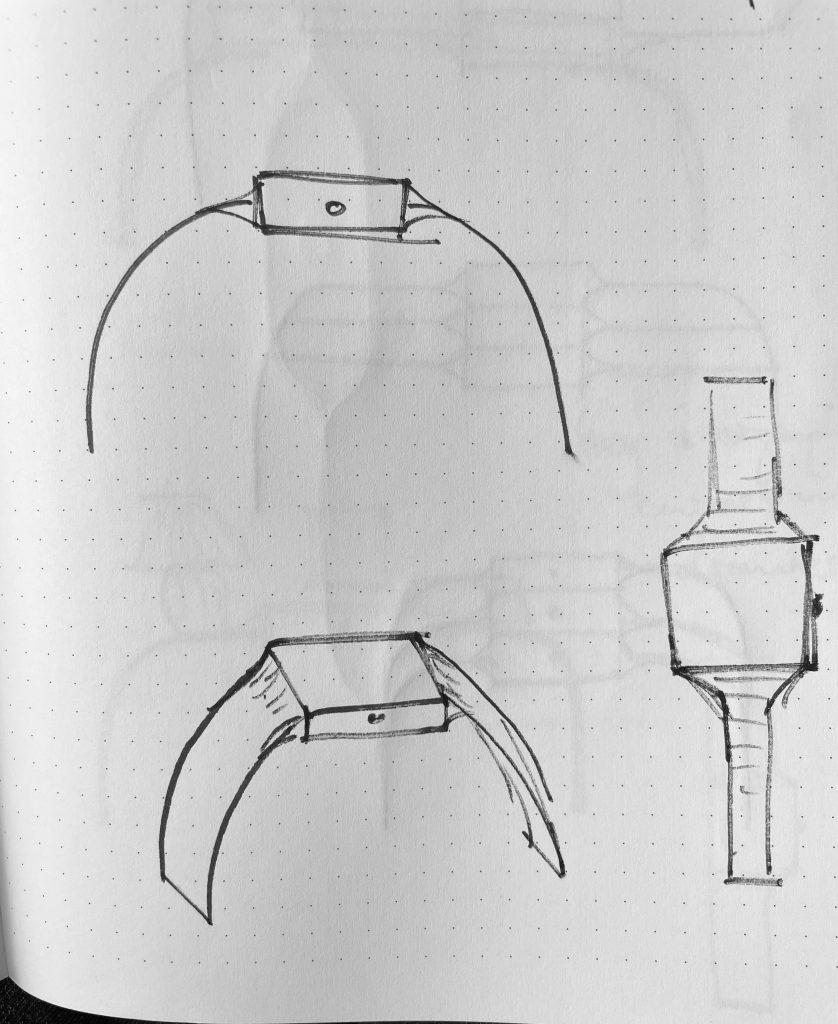
The first sketches started off with curves sweeping up continuously from the ground, and looked rather like a watch from above.
The continuous curves were refined to have vertical sides and horizontal sections which would act as shelves and widen the table to give it some practicality. Several subsequent sketches developed to have several stacked drawers and multiple shelves, but for the initial build I decided to focus on the elegance of a single level with a single drawer.

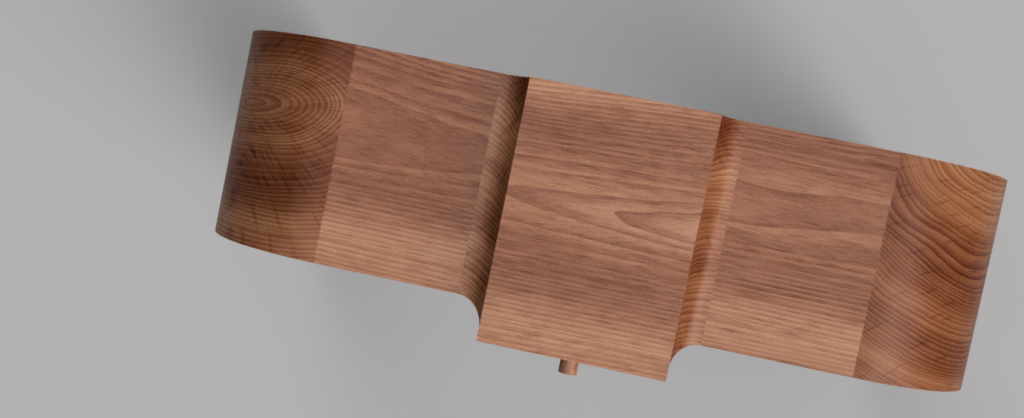
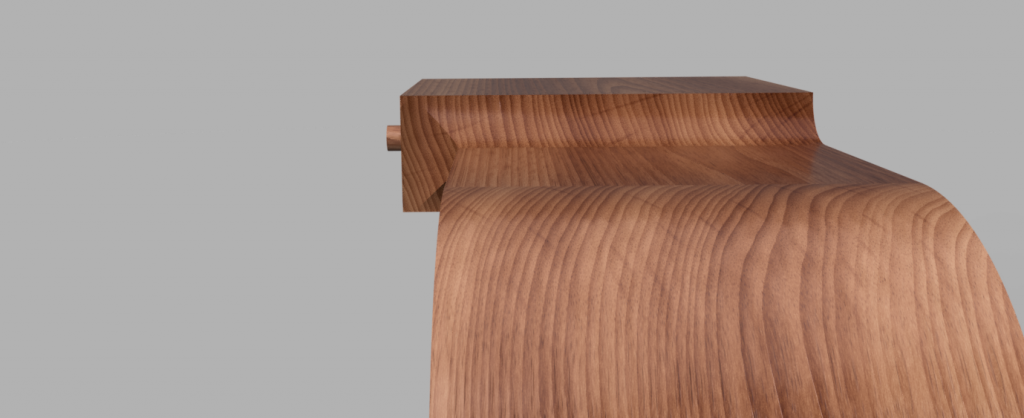
I quickly decided that the top of the drawer case should sit higher than the shelves on either side and should also be proud from the front of the table, with the drawer case swelling organically out of the horizontal.
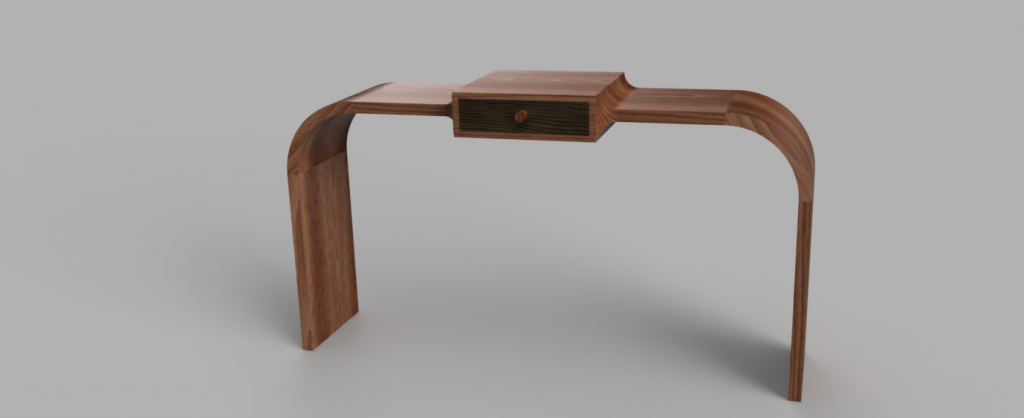
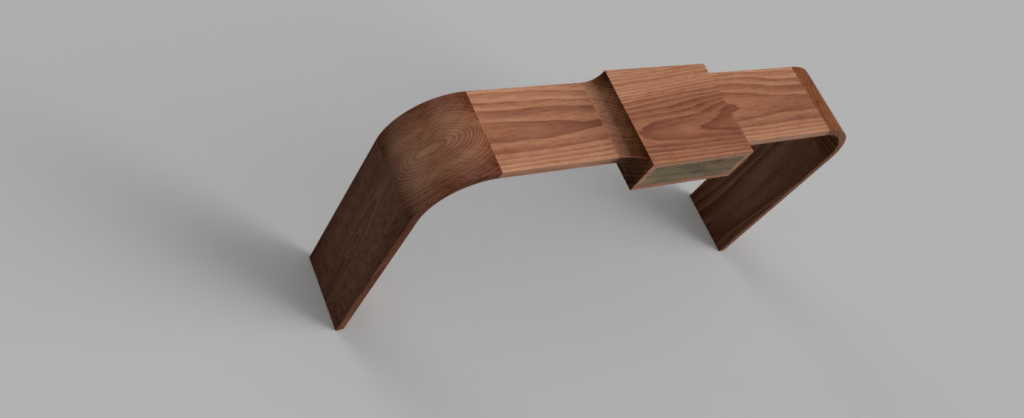
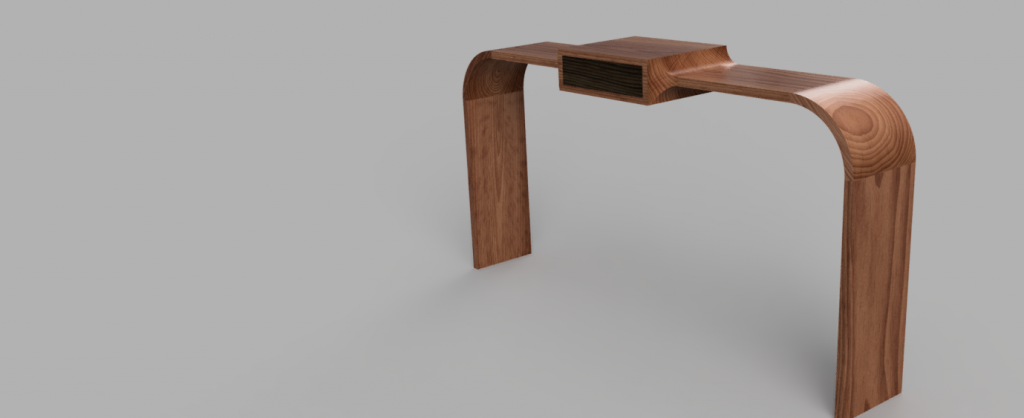
Next, I took the paper sketches and made a computer version within modelling software. This is a powerful step in the design process because it forces you to decide upon the actual size and relative of your design, whilst also providing the tools to very quickly try out as many different variations of dimensions as you like. The software can also provide photo-realistic renderings of the design so that you can really get a feel for what it will look like once built. The design met with approval from my colleagues and so it was time to actually make it.

‘Virtual’ designs are all very nice and pretty but, in order to get a feel for how the proportions work in real life and to work through ideas for how to construct the design, the next stage in the design process is modelling. I made scale models from oak and from polystyrene and experimented with making the main leg curves using a process known as kerf-cutting, whereby a series of incisions are made into the wood to allow it to be bent more easily.

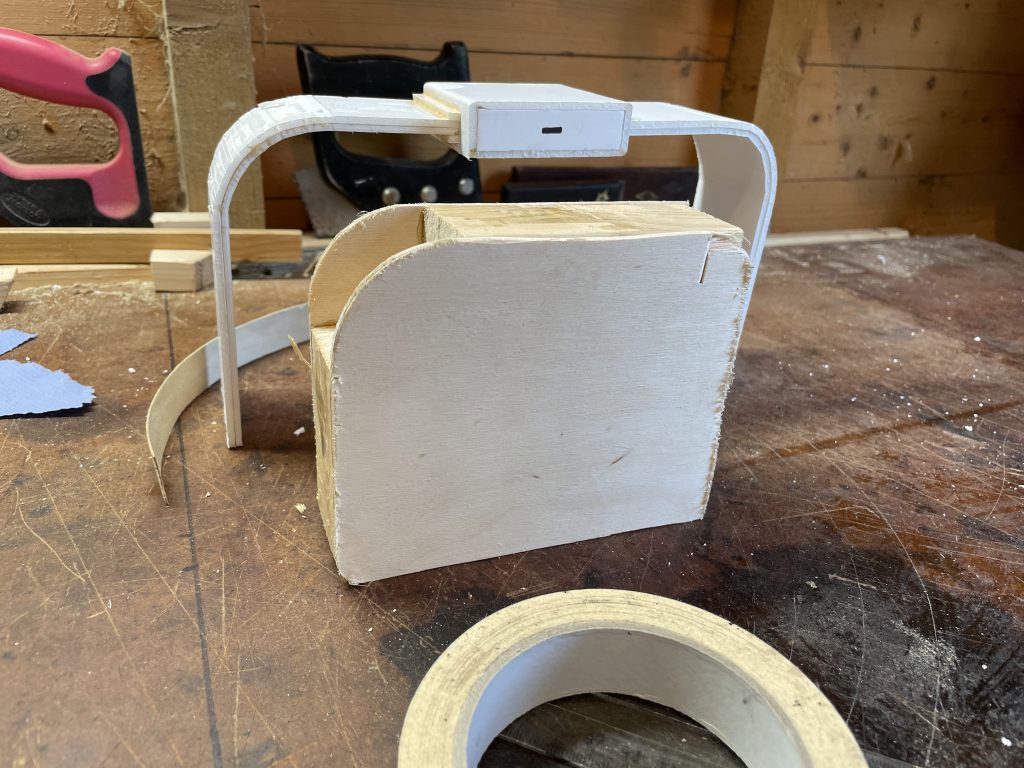

Seeing these scale models prompted me to alter some of the dimensions and I moved onto making a full-size model from polystyrene. This gave me a chance to experiment with what is known as a ‘torsion’ box – where a box lattice is sandwiched between two surfaces to make a strong and light construction that is resistant to bending and twisting. I had discounted lamination as a method for constructing the legs as I thought they would end up too heavy at full size and thickness, and I also discounted steam-bending as it would be unlikely that they would retain their shape without the addition of a stretcher across the back of the table – something which I wanted to avoid for aesthetic reasons.

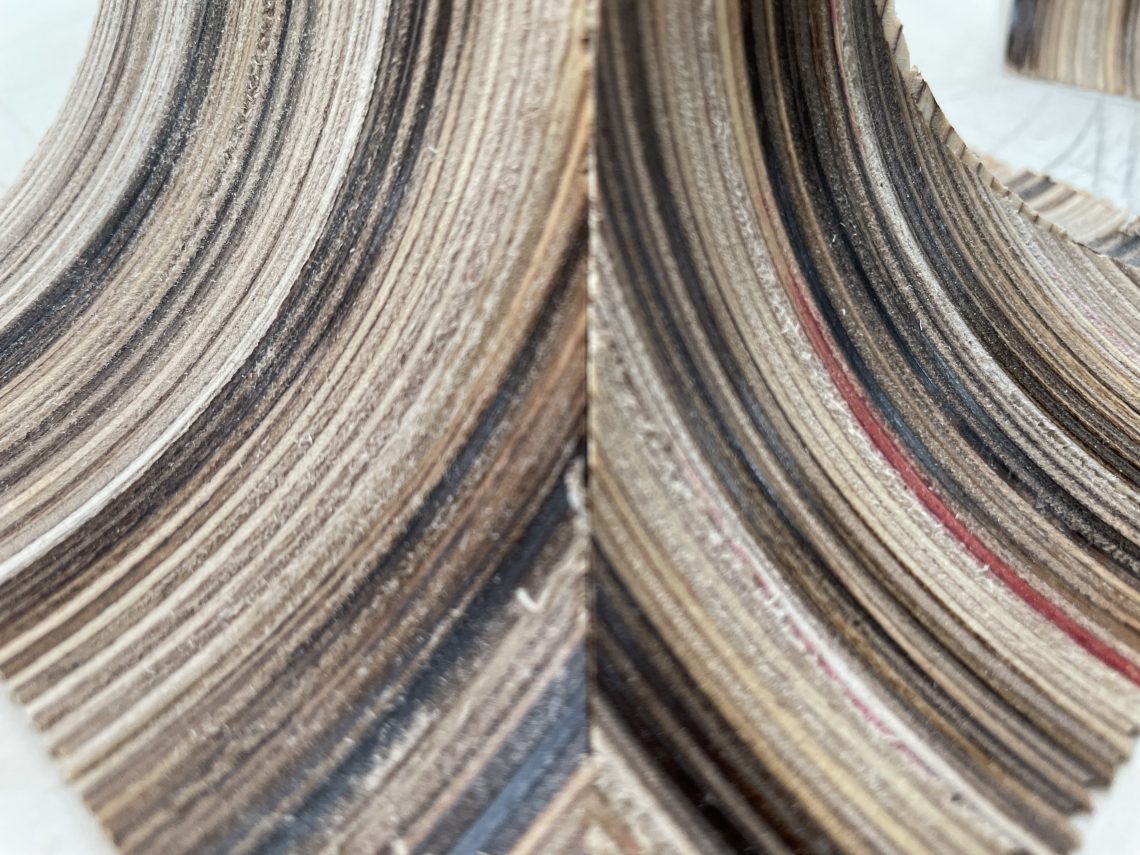
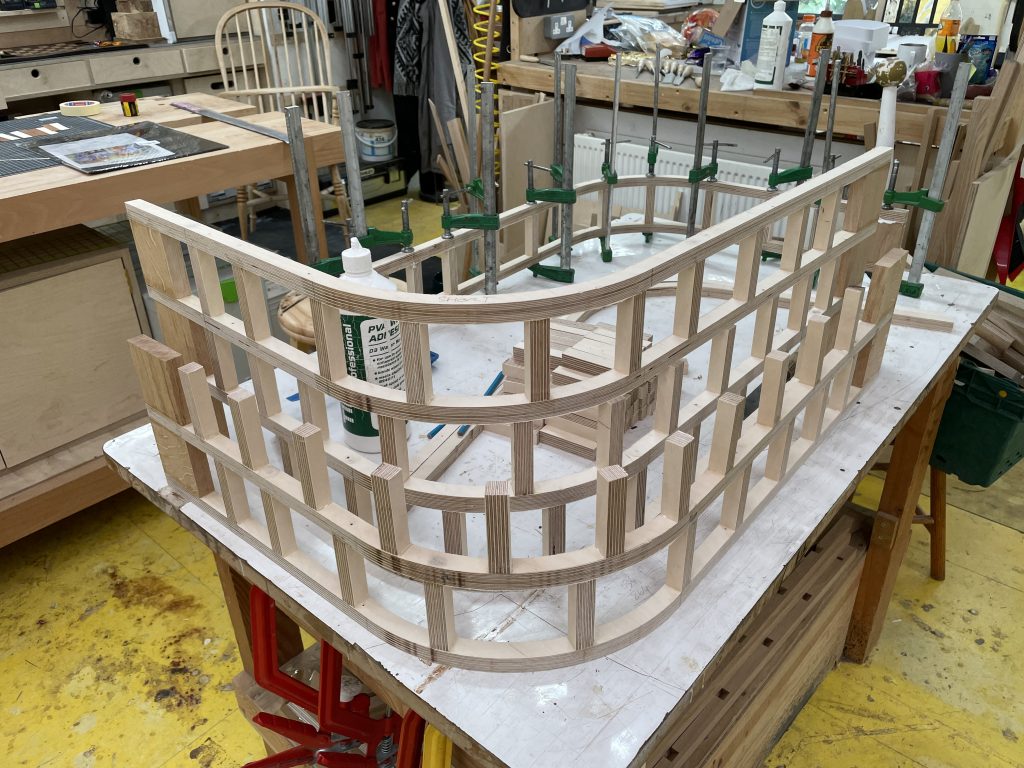
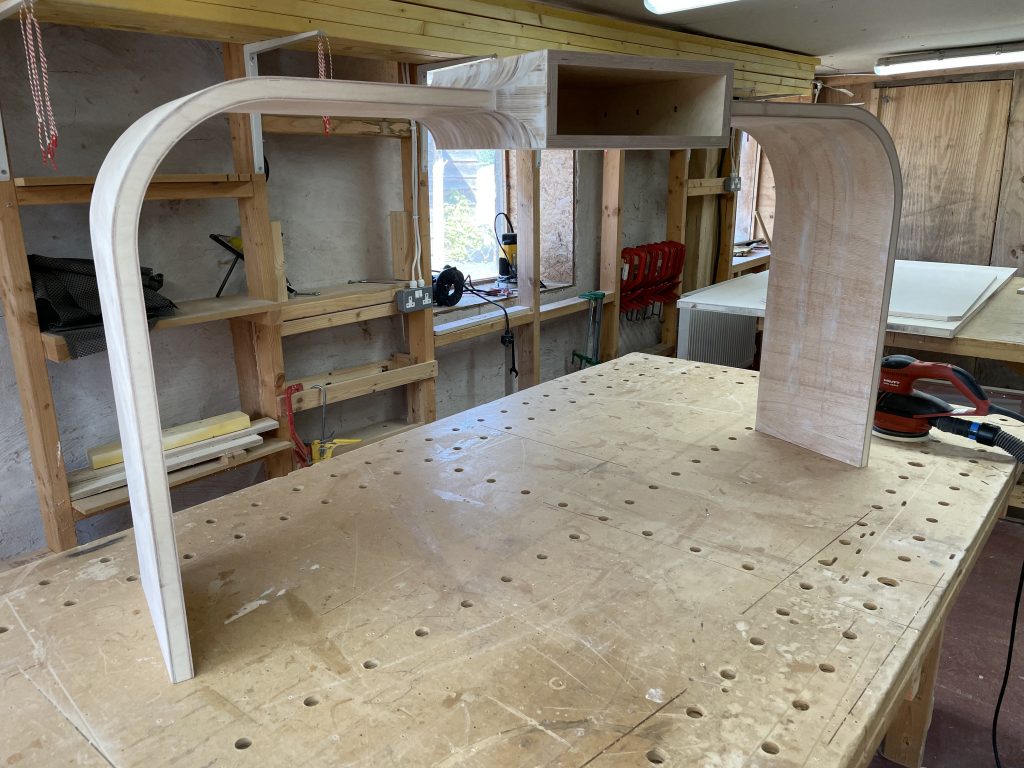
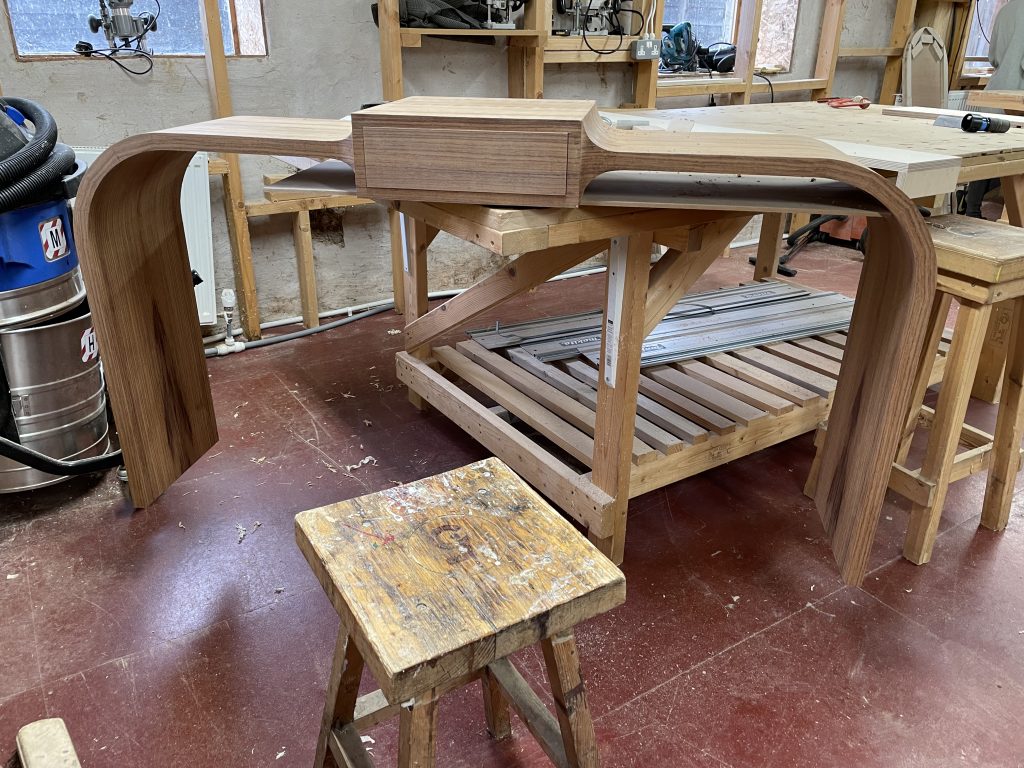
Having made the full-size model I was able to see that the table needed to be just a little taller, and just a little wider, and so I now had all of the major dimensions and importantly the main construction methodology had been trialled (in polystyrene). The next pictures show the construction of the latticework for the legs which was then skinned with bendy plywood to give the two rigid legs. A series of plywood curved forms were cut out of sheet plywood and stacked and mitred to form the ‘scalloping’ around the drawer box.

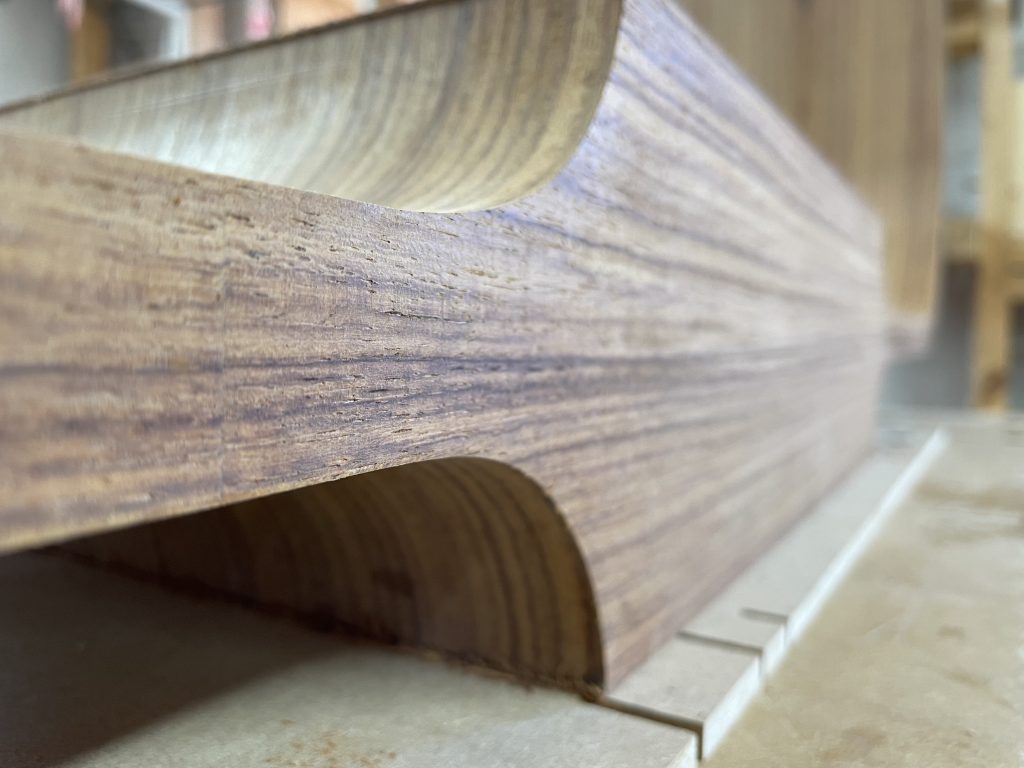
The final and most tricky part of the project was the veneering. Veneering is usually done to flat surfaces. Not only that, but veneering is usually done to these flat surfaces before they are assembled into a structure. Veneering a curved structure, curving in two directions, curving tightly (50 mm radius at the drawer box), and in lengths of over 130 cm would be very tricky.
I wanted the veneer to flow up the legs and onto the top of the drawer box in an unbroken curve. I also wanted the veneer to be matched on both the the inside and outside surfaces of the legs and in the scallops of the drawer box. It was those design choices that had mandated both the torsion box construction but would also drive the method used for applying the veneer to the form.
We had ruled out veneering the bendy plywood before attaching to the latticework (the veneer breaks) and we had also ruled out trying to bend the plywood whilst the veneer glue was not fully set (the veneer breaks).
We had only two possible methods that we thought would work: (1) by hot iron, or (2) using a vacuum bag. In method (1) the glue is applied to the substrate and the veneer is then pressed on using the iron, with the heat of the iron also helping to accelerate the curing of the veneer glue. A problem with this method is the time that it would take to actually do the whole surface of each leg 130 cm x 30 cm, but the principal problem is using a flat iron to press veneer onto a concave surface. So, that left method (2) which would require a vacuum bag big enough to contain the entire console table which is 150 cm long and 90 cm tall and 30 cm deep. The vacuuming would need to be done in a such a way that even pressure was applied to the entire surface being glued at that point, whilst also not crushing the table!
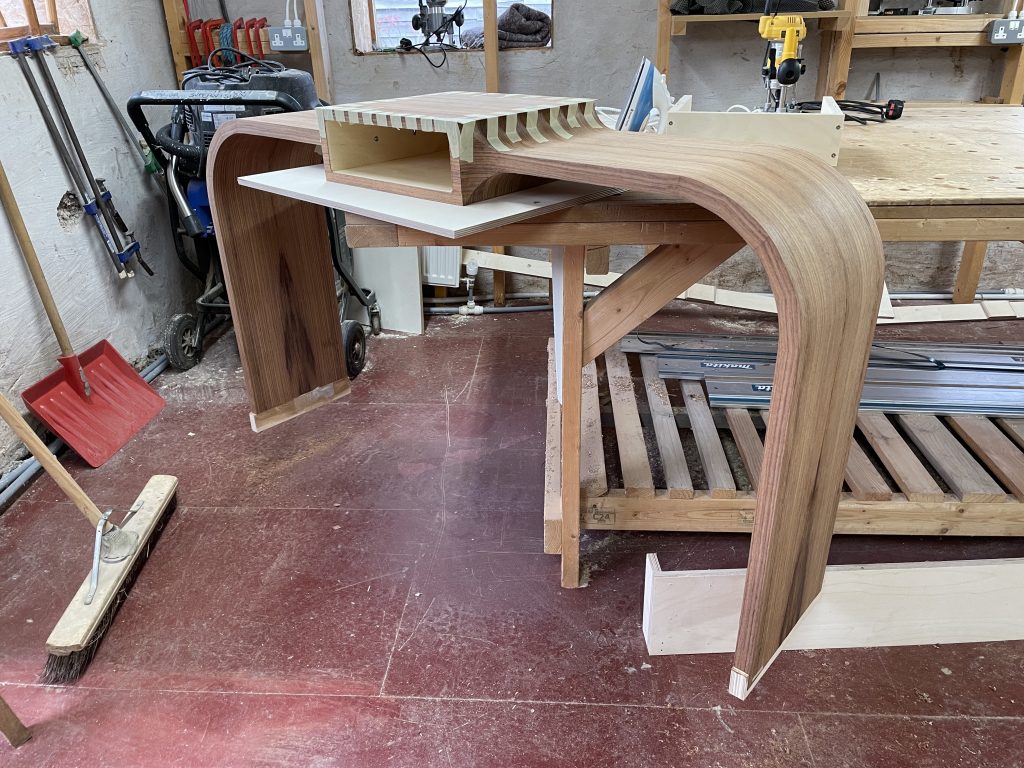
So, method 2 was selected. To make the process more manageable we split the veneering of the legs into four separate operations – the inside and outside of each leg was a separate process. The first picture below shows the inside of one leg being pressed within the vacuum bag. In the second picture all four legs have been completed – and they still show the masking tape used to hold the separate strips of veneer together.


I have to admit that I was sceptical that I would be able to get the veneer attached smoothly and in one piece, but it worked! There was one issue when the veneer did not fully compress into the scallop on the top and this was fixed afterwards with some careful application of a hot iron. The rest of the veneering – the flat front and rear edges and the top and bottom of the drawer case – was also done by iron, principally because of their small size and they were flat.
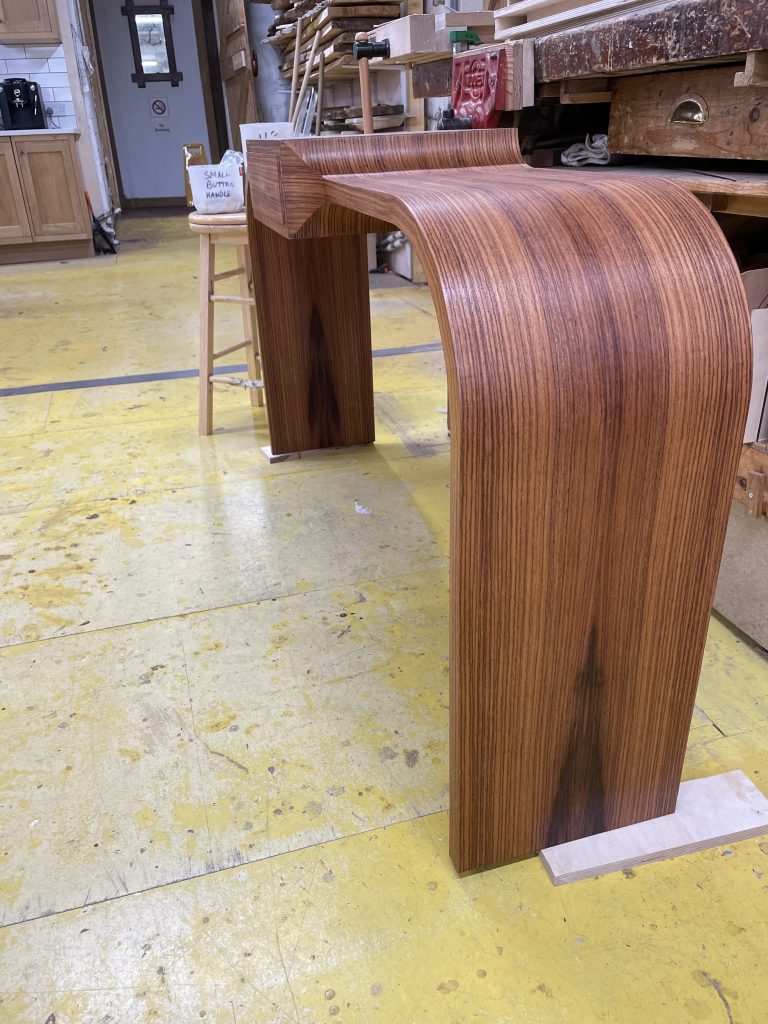
Final stages were to construct the drawer from solid ash – and for this I tried a slightly different sliding half-dovetail method for attaching the sides – and then apply a matched rosewood veneer to the front. Applying the finishing oil and wax really brought out the colours of the rosewood and I am extremely happy (and relieved) with the final result. It even looks like the render. 🙂

The entire project was very laborious and very challenging as a result of the engineering and veneering problems, but that is precisely why I wanted to make this table. There is little point going to school if you do not learn, and I certainly managed that in this build: torsion box – done, routing inside and outside curves using formers – done, vacuum bag veneering – done, hot iron veneering – done, solid wood sliding half-dovetail drawer – done.

